
“Cook!” This word has been thrown around so much lately by our toddler, that it doesn’t even sound like a real word anymore! But “cook” is what’s getting our son to eat more, so we decided to help grow this concept for him by getting him his own little play kitchen.

It all started one day when we attended a fantastic play date! The host had an adorable little play kitchen that C1 just couldn’t turn away from. We didn’t know he was interested in what goes on in the kitchen so that night my husband hoisted our son into his helper tower and let him get a little hands-on experience by making dinner. Because he doesn’t understand the concept of time, he wants his food in front of him the instant it crosses his mind, we thought getting him more involved and fueling his curiosity would help him see the process from fridge to table. It worked! My child even ate broccoli, (BROCCOLI FOLKS!) because he helped to cook it. A kitchen of his own was the next logical step. TO IKEA!

This was a major undertaking (one I never thought to take process pictures of ). We changed just about every surface of the IKEA Duktig Kitchen and while we didn’t add anything new to the throngs of upgrades peppered all over Pinterest, we have our own unique combination of upgrades that make it more personalised. Also, since this was going to be a furniture piece on the main floor, we did our best to make it mesh with our own kitchen.

The first piece to get an upgrade was the counter. While we have a beautiful quartz counter, contact paper does not come in an identical pattern so we made his marble! It instantly gave the kitchen a clean polished look. It was easy to apply and very forgiving, thank god!
Next, we spray painted the wood finished pieces so everything was white. Simple enough! The most important piece was the backsplash. Here we had an opportunity to tie his kitchen in with ours! This stage was not so easy.

First of all, the kitchen doesn’t come with a backing so we had to buy a thin sheet of wood, similar to the backings of IKEA furniture pieces. Next, we scrounged the city to find peel and stick subway tiles that were being discontinued due to colour variations. The defect didn’t matter because we were spray painting the entire thing anyway. We cut them out and stuck them on individually and then weighted the entire backsplash for 24 hours. Then I coated the entire thing in Modge Podge to seal it against moisture and peeling, spray painted it white and then sealed it again with clear finishing spray paint. It’s safe to say it’s pretty darn solid and not going anywhere. We finished by tacking it to the back of the kitchen cabinets with finishing nails.


Next step was the details. We got identical cabinet handles to ours (not hard since they are also IKEA) with a different handle for the microwave. I taped off the microwave and oven doors and spray painted the edges of the glass black, to make them more realistic. We added turnable oven knobs which are just dresser pulls that haven’t been completely tightened so they still turn *shrugs. And lastly, which was my favourite step, we added motion detection lights to the appliances so they turn on when the doors open like real appliances and a mounted light bar to the underside of the upper cabinets!
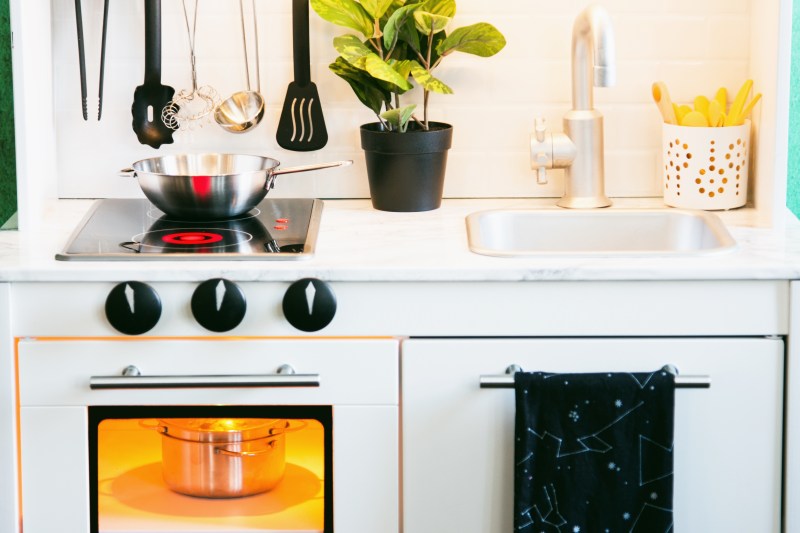
We couldn’t be happier with how it turned out! It looks fantastic in its little corner next to the kitchen. C can cook his own little meals alongside us in the kitchen. He’s already made quite a few alphabet soups (fridge letter magnets in a bowl) and sandwiches! ❤

A little before and after!


He really seems to love his kitchen! Beautiful work!
LikeLike